Maximize Winter Savings: Insulate Your Windows to Slash Energy Bills
Author Archives : Nathan
Maximize Winter Savings: Insulate Your Windows to Slash Energy Bills
As the cold winter months settle in, homeowners often find themselves grappling with skyrocketing energy bills. With the constant need for heating, maintaining a comfortable indoor temperature can be both financially draining and environmentally taxing. However, there’s a simple and effective solution that can significantly reduce energy consumption and trim down those hefty bills: insulating the interior side of your dwelling windows.
Windows are notorious culprits when it comes to heat loss in homes during the winter. Even the most energy-efficient windows can allow a substantial amount of heat to escape, leading to increased energy consumption as your heating system works overtime to compensate. However, by properly insulating your windows, you can create a barrier that traps heat indoors, keeping your home warmer and your energy bills lower.
Here are some tips on how to effectively insulate the interior side of your windows to capture more heat and waste less energy:
- Choose the Right Insulation Material: There are various options available for window insulation, including window film, weatherstripping, and window quilts. Window film is a popular choice as it is affordable, easy to install, and transparent, allowing natural light to enter while blocking heat loss. Weatherstripping is ideal for sealing gaps and cracks around windows, preventing drafts and minimizing heat loss. Window quilts, on the other hand, are fabric coverings that can be pulled down over windows at night to provide an extra layer of insulation.
- Install Insulating Window Treatments: Consider installing insulating window treatments such as thermal curtains or cellular shades. These specialized curtains and shades are designed with multiple layers of fabric or cells that trap air, creating a barrier against heat loss. By keeping these treatments closed during the night and when the windows are not in use, you can significantly reduce heat loss and improve energy efficiency.
- Apply Window Insulation Kits: Window insulation kits are affordable, DIY-friendly solutions that can help improve the energy efficiency of your windows. These kits typically include plastic film that can be applied to the interior side of windows using double-sided tape and then heated with a hairdryer to create a tight seal. The trapped air between the film and the window acts as an insulating barrier, reducing heat loss and preventing drafts.
- Seal Leaks and Cracks: Inspect your windows for any leaks or cracks that may be allowing cold air to seep into your home. Use caulking or weatherstripping to seal any gaps around the window frame and between the window and the wall. This simple step can help prevent drafts and improve the overall energy efficiency of your windows.
- Consider Secondary Glazing: If you have single-pane windows or older double-pane windows that are not energy-efficient, consider installing secondary glazing. Secondary glazing involves adding a supplementary pane of glass or acrylic to the interior side of existing windows, creating an additional barrier against heat loss. While this option may require a higher upfront investment, it can result in significant long-term energy savings.
By taking proactive steps to insulate the interior side of your dwelling windows, you can effectively capture more heat indoors and waste less energy during the winter months. Not only will this help reduce your energy bills, but it will also contribute to a more sustainable and environmentally friendly lifestyle. So why wait? Start insulating your windows today and enjoy the warmth and savings all winter long.
Conquering Clogged Gutters: Top Strategies for Keeping Your Eavestroughs Leaf-Free
Ah, autumn. The leaves turn vibrant, there’s a crispness in the air, and… your gutters become a chaotic battleground of leaves, twigs, and other debris. Clogged eavestroughs can lead to a cascade of problems, from overflowing water damaging your foundation to pesky ice dams forming in winter.
But fear not, fellow homeowner! Here’s your battle plan for keeping your eavestroughs clear and your home protected:
Guarding Against the Onslaught:
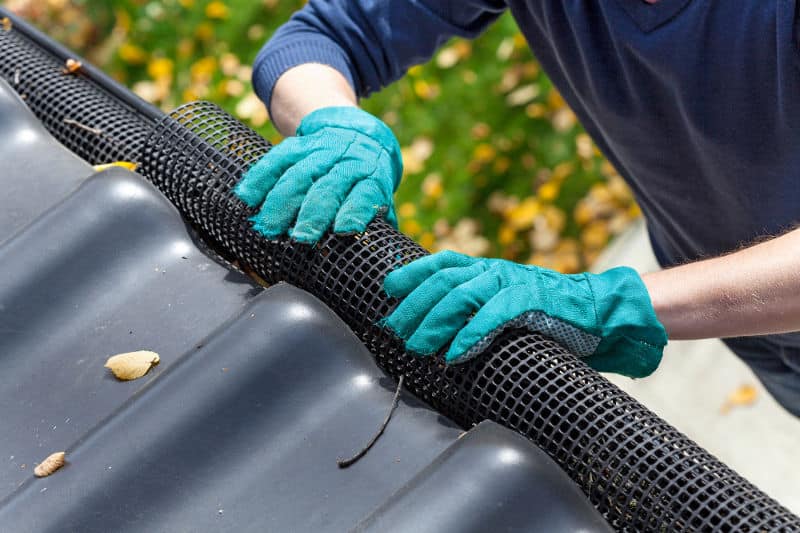
- Leaf Guards: These mesh or micro-mesh screens fit over your eavestrough, filtering out leaves while allowing water to flow freely. They come in various types, from simple foam inserts to more robust micro-mesh options.
- Pros: Low maintenance, long-term solution.
- Cons: Can be expensive upfront, may clog with heavy debris like pine needles.
- Gutter Covers: Similar to leaf guards, gutter covers offer a more complete barrier. Often made of solid materials like metal or plastic, they block leaves entirely.
- Pros: Very effective at keeping leaves out.
- Cons: Can be difficult to install, may trap ice and snow in winter, pricier than leaf guards.
- Regular Cleaning: The classic (and free!) approach. Schedule regular cleanings, especially in fall and spring when leaves are abundant. Use a sturdy ladder, gloves, and a gutter scoop to remove debris.
- Pros: Affordable, allows you to inspect your eavestroughs for damage.
- Cons: Time-consuming, can be dangerous working at heights.
Pro Tip: Consider a leaf blower for quicker cleaning, especially for removing loose leaves before they accumulate and clog the system.
Nature’s Helping Hand:
- Strategic Planting:Plant trees away from your house, particularly those known for excessive leaf shedding. Consider evergreens or low-leaf-producing varieties near your roofline.
- Encourage Drainage:Ensure the ground around your foundation slopes away from the house, directing water flow away from the structure.
Bonus Tip: If you’re feeling particularly tech-savvy, gutter cleaning robots are becoming more popular. These little marvels can navigate your eavestroughs and gather debris for disposal.
By implementing some (or a combination) of these strategies, you can keep your eavestroughs free-flowing and prevent costly water damage down the line. Remember, a little preventative maintenance goes a long way in ensuring your home stays healthy and dry throughout the year.
Do you have any tried-and-true methods for keeping your eavestroughs clear? Share your tips in the comments below!